The kitchen tap is the workhorse of the Australian home. It’s there for the morning coffee, the frantic school lunch prep, and the endless cycle of dinner parties. But when that reliable fixture starts to drip incessantly or the handle loses its smooth glide, it can quickly become a source of daily frustration. Replacing a kitchen tap might seem like a task reserved for those with a trade certificate, but with the right guidance, it is one of the most rewarding DIY projects you can tackle for the first time on a Saturday morning.
Can You Replace a Kitchen Tap Yourself?
The short answer is yes, but with a slight caveat regarding local regulations. In Australia, major plumbing work, like moving pipes or installing new drainage, must be done by a licensed plumber. However, replacing a like for like fixture, such as swapping an old tap for a new one using existing connections, is a common task for the confident DIY.
If you can use a spanner and aren’t afraid to spend thirty minutes on your back inside a cupboard, you can do this. The key is preparation. Approaching the job with a “she’ll be right” attitude often leads to a flooded kitchen floor. Instead, treat this as a careful process. Gather your tools, understand your setup, and move methodically.
Before You Start: Know Your Kitchen Tap Setup
Before you rush to the hardware store and fall in love with a brushed brass gooseneck tap, you need to understand what’s happening beneath your sink. Not all taps are created equal, and compatibility is the difference between a one hour job and a three day headache.
Identify Your Tap Type: Mixer, Monobloc, Deck Mounted or Wall Mounted
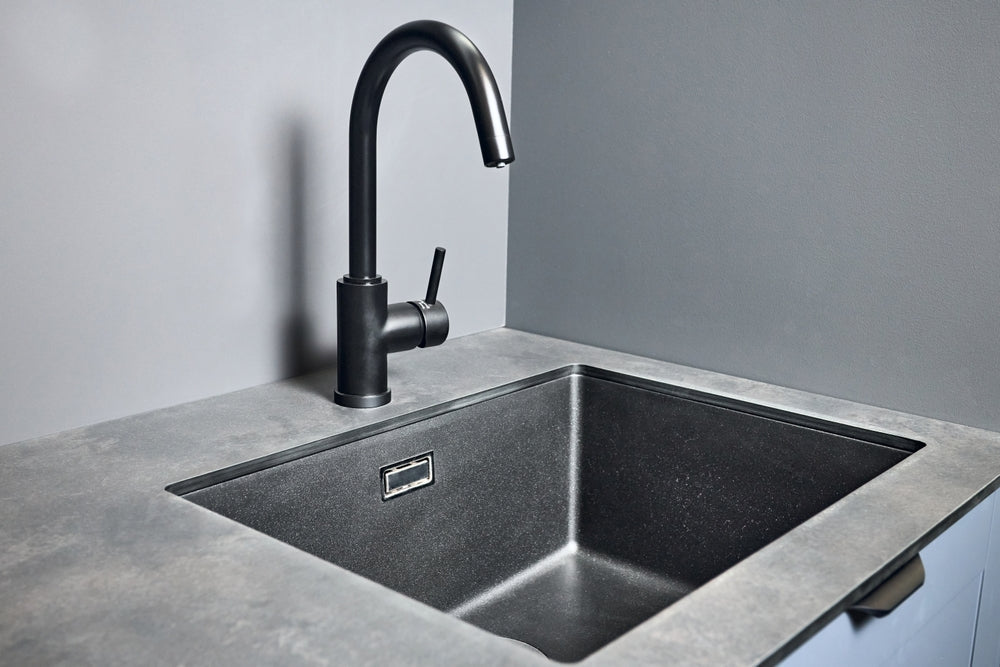
Most modern Australian kitchens feature a mixer tap, where a single lever controls both hot and cold water. These are typically monobloc, meaning they sit in a single hole drilled through the sink or benchtop.
If your kitchen is a bit older, you might have deck mounted taps, which consist of two separate pillars for hot and cold. Even rarer in modern setups are wall mounted taps, which emerge directly from the splashback. Take a photo of your existing tap setup to the shop. It’s the easiest way to ensure your new kitchen tap will actually fit the existing hole in your kitchen sink.
Check Your Water Pressure and Existing Connections
Australia has specific water pressure standards, but older homes can be unpredictable. High pressure taps in low pressure gravity fed systems may result in a weak trickle. Conversely, very high pressure can damage certain designer taps.
Look under your sink at the flexible hoses, which are the braided stainless steel lines. Check if they are 1/2 inch connections, which is the Australian standard. If your plumbing is very old and uses rigid copper pipes all the way to the tap, you may need to install flexible connectors to make the DIY process manageable.
Tools You’ll Need
Think of your toolkit as your support crew. You don’t need a professional workshop, but trying to tighten a nut with the wrong sized pliers is a recipe for stripped threads and bruised knuckles.
Basic Tools and Parts
Gather these, along with a flat head screwdriver for certain mounting plates, before you even think about turning off the water:
An adjustable wrench or spanner. Ideally two, so you can hold one pipe steady while turning the nut on the other.
A tube wrench or basin wrench. This is the secret weapon. It’s a specialised tool designed to reach the deep, narrow nut that holds the tap to the underside of the sink.
A bucket and old towels. Water remains in the pipes even after the supply is off. Expect a splash.
Thread seal tape, Teflon tape or plumber’s tape. This helps create a watertight seal on threaded joins.
A torch or headlamp. It’s dark under the sink.
Step 1: Turn Off the Water Supply
This is the most critical step. If you skip this, your kitchen will transform into a water park within seconds.
Locate the Isolation Valves
Most modern Australian homes have isolation valves or shut off valves under the sink. These are small taps on the pipes leading to your main tap. Turn them clockwise until they stop. If your home doesn’t have these, you’ll need to go outside to the water meter, usually located near the front boundary, and turn off the main supply to the entire house.
Clear the Area Under the Sink
Remove the half empty bottles of dish soap, the recycling bin, and the collection of plastic bags. You need space to lie down and move your arms, ensuring better access to the connections. A clear workspace reduces stress and prevents you from losing small washers in the clutter. Once the water is off, open the kitchen tap to release any built up pressure and drain the remaining water in the line.
Step 2: Remove the Old Kitchen Tap
Now comes the removal phase. It’s usually the messiest part, as old pipes can be stubborn.
Disconnect the Water Hoses
Using your adjustable wrench, unscrew the flexible hoses from the isolation valves. This is where your bucket comes in handy. Place it underneath the joins to catch the remaining water sitting in the lines. If the hoses are stuck, a quick spray of WD 40 can help, but be patient. You don’t want to twist the copper pipes coming out of the wall.
Remove the Tap
Crawl into the cupboard and look up at the base of the tap. You’ll see a large nut, or sometimes two, holding a mounting plate against the underside of the sink. Use your basin wrench to loosen this nut. Once it’s off, you should be able to lift the old tap straight up and out through the hole in the benchtop.
Step 3: Prepare the Sink Area
With the old tap gone, you’ll likely see a ring of grime, limescale, or old plumber’s sealant and putty around the hole.
Clean Around the Tap Hole
Use a non abrasive cleaner to scrub this area until it’s spotless. If the surface is uneven or dirty, the new tap’s O ring won’t sit properly, leading to water leaking from the benchtop down into your cupboard every time you do the dishes. Ensure the area is completely dry before proceeding.
Step 4: Install the New Kitchen Tap
This is the moment of truth. Handle your new tap with care. Finishes like matte black or chrome can scratch easily if they knock against the stainless steel sink.
Feed the Hoses Through the Tap Hole
Most modern taps come with the flexible hoses already attached to the tap body. Feed these hoses through the hole first, then lower the tap body into place. If your tap has a separate base plate or escutcheon, make sure it is positioned correctly with its rubber gasket to prevent water from seeping under the tap.
Secure the Tap Under the Sink
This usually requires a bit of gymnastics. From underneath, slide the rubber washer, metal washer, and locking nut over the hoses and onto the threaded rod of the tap. Hand tighten the nut first. Before you tighten it fully with the wrench, have someone stand above the sink to ensure the tap is straight and facing the right direction. There is nothing more annoying than a tap that is slightly crooked.
Step 5: Connect the Water Lines
The finish line is in sight. You just need to connect your house pipes to your new fixture.
Connect the Hot and Cold Hoses
Screw the flexible hoses onto the isolation valves. In Australia, the hot water is traditionally on the left and the cold on the right. Do not tighten these too much. Most flexible hoses have a rubber seal that does the work. Tighten them by hand, then give them a quarter turn with the wrench. Be careful not to tighten too much, as this can crush the rubber seal and actually cause a leak.
Step 6: Test for Leaks
Do not simply walk away once the connections are made. The testing phase is where you ensure your hard work holds up under pressure.
Turn the Water Back On Slowly
Go to your isolation valves, or the main meter, and turn the water back on very slowly. You want to pressurise the system again gently. Open the tap handle to the “on” position to let air bleed out of the lines. You’ll hear some sputtering and coughing, which is perfectly normal.
Check Under the Sink for Leaks
Grab a dry paper towel and run it along every connection point. If the towel stays dry, you’re in the clear. If you see even a tiny bead of water, give the nut a little more tension with your wrench. Keep an eye on it for the next hour. Sometimes slow drips take time to reveal themselves.
Troubleshooting Common Issues After Installation
If the water flow feels weak, check the aerator, which is the mesh piece at the tip of the spout. Construction debris or sediment from the pipes often gets trapped there during the first run. Simply unscrew it, rinse it out, and put it back.
If the tap is making noise or vibrating, you might have air trapped in the lines, or the isolation valves might not be fully open. Ensure all valves are turned all the way to the open position.
How to Maintain Your New Kitchen Tap
To keep that new shine, avoid harsh chemical cleaners. Most Australian tap manufacturers recommend nothing more than warm soapy water and a soft microfibre cloth. For matte finishes, avoid any scrubbing pads, as they can create permanent shiny spots on the finish. Every few months, unscrew the aerator and soak it in white vinegar to dissolve any calcium build up, especially if you live in an area with hard water.
When to Call a Plumber
DIY is about knowing your limits. If you crawl under the sink and find that the pipes are severely corroded, or if the main isolation valve is leaking and won’t turn off, it’s time to call in a professional. Similarly, if you have a pull out spray tap that requires complex counterweights and you can’t get the tension right, a plumber can save you hours of frustration. It is always cheaper to pay a plumber for an hour of work than to pay for a new kitchen floor because of a major flood.
Final Checklist
Before you declare the job done, run through this final list:
-
Alignment: Is the tap centred and straight?
-
Temperature: Does “Hot” actually deliver hot water? Hoses can easily be swapped by mistake.
-
Clearance: Does the tap hit the splashback or windowsill when turned?
-
Watertight: Have you checked the cupboard for drips ten minutes after installation?
Ready to upgrade your kitchen tap? Explore Luxern Home’s stylish kitchen tapware collection to find the perfect design, finish and function for your Australian home. Whether you are replacing an old tap or planning a full kitchen refresh, Luxern Home offers quality tapware to suit modern interiors. Contact us today if you need help choosing the right kitchen tap for your space.
Share: